You’ve got the box open, the platter still wrapped, cables coiled like a puzzle, and one thought in the back of your mind: I don’t want to get this wrong. That feeling is normal. A good record player setup looks simple once it’s done, but the difference between “it plays” and “it sounds right” lives in the details.
That matters even more if your standards come from dance floors, wedding rooms, and proper listening sessions rather than background music in the kitchen. A turntable doesn’t forgive lazy setup. If the surface is off, if the cartridge is skewed, if the grounding is poor, the problems show up fast. Hum, distortion, weak bass, smeared vocals, skipping at the worst moment.
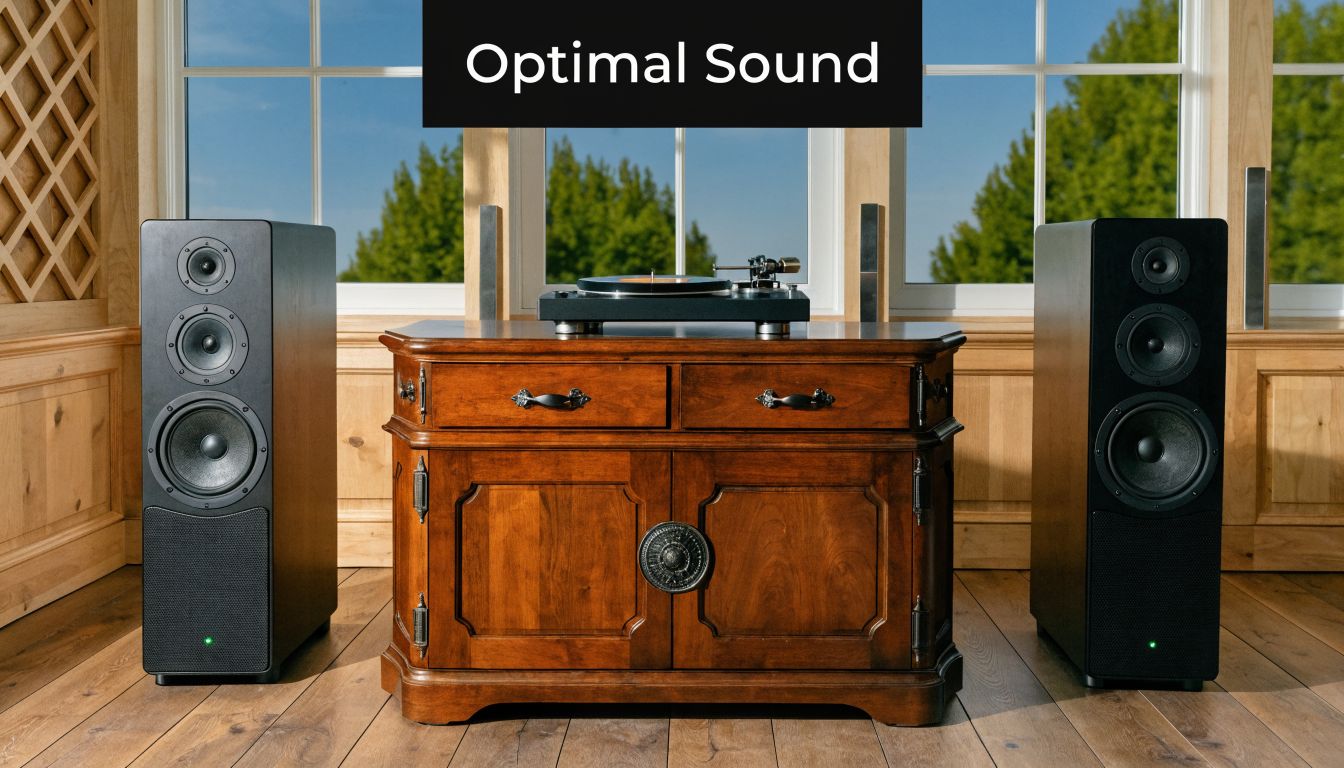
A proper setup isn’t about being fussy for the sake of it. It’s about respecting the record, protecting the stylus, and getting the kind of sound that makes people stop talking and move closer to the speakers.
From London with Love The Soul of a Proper Record Player Setup
Unboxing a turntable still has a bit of magic to it. You lift the lid, pull back the packaging, and there it is: the plinth, the platter, the tonearm, the little parts that look delicate enough to intimidate anyone on day one. A common starting point is to consider what will be played first. The better instinct is to think about where it’s going to sit, how it’s going to track, and whether the whole thing is being built to last.
That mindset is older than commonly understood. In the UK, the gramophone shaped the foundation of modern record player setup after Emile Berliner’s 1887 patent for flat disc playback, replacing Edison’s cylinder format with the design language we still recognise now. By 1895, gramophones were mass-produced, and London became central to that story when Berliner’s Gramophone Company was established there in 1898 and began manufacturing shellac 78 rpm discs, as outlined in this history of the vinyl player.
Those early machines didn’t have the luxury of modern electronics to cover mistakes. They relied on physical accuracy. Plinth stability mattered. Groove-tracking accuracy mattered. If the machine wobbled or the stylus failed to follow the groove properly, the result wasn’t subtle. That same truth still governs every decent record player setup now, whether it’s in a front room or beside a dance floor in Kent.
Craft matters before the first record spins
A lot of modern buyers assume setup is mostly plug-and-play. Some decks make it feel that way, but vinyl always tells the truth. A rushed setup gives you rushed sound. A careful one gives you weight, depth, timing, and control.
Practical rule: If you want warmth, punch, and clarity from vinyl, don’t chase it first through expensive upgrades. Build it first through correct setup.
The irony is that the “old-fashioned” part of vinyl is exactly what makes it so demanding and so satisfying. The stylus is physically tracing information from a groove. Nothing is abstract. Every tiny error becomes audible.
That’s why I treat record player setup as a craft, not a chore. You’re not just assembling gear. You’re preparing an instrument. Even the visual side of that ritual has its place, and a strong setup has the same quiet confidence as the classic Vinyl Gold identity: clean, intentional, and built around feel as much as function.
What separates a home setup from a performance-ready one
A standard home listener can get away with a few compromises. A DJ can’t. At home, a little hum might be annoying. At an event, it’s unacceptable. In a quiet listening room, a slightly lively surface might only blur the bass. In a venue with people moving around, that same weakness can make a stylus jump.
The craft starts the same way in both cases. Stable support. Correct assembly. Clean signal path. Accurate tracking. The difference is that a professional setup has less tolerance for chance. It has to work every time.
That’s the thread running through everything below. Not audiophile theatre. Not overcomplication. Just the parts that make a deck dependable from the box to the beat.
Unboxing and Assembling Your Turntable
The first job is simple: slow down. Most assembly mistakes happen because someone wants to hear a record within ten minutes and starts forcing parts that were meant to be fitted gently.
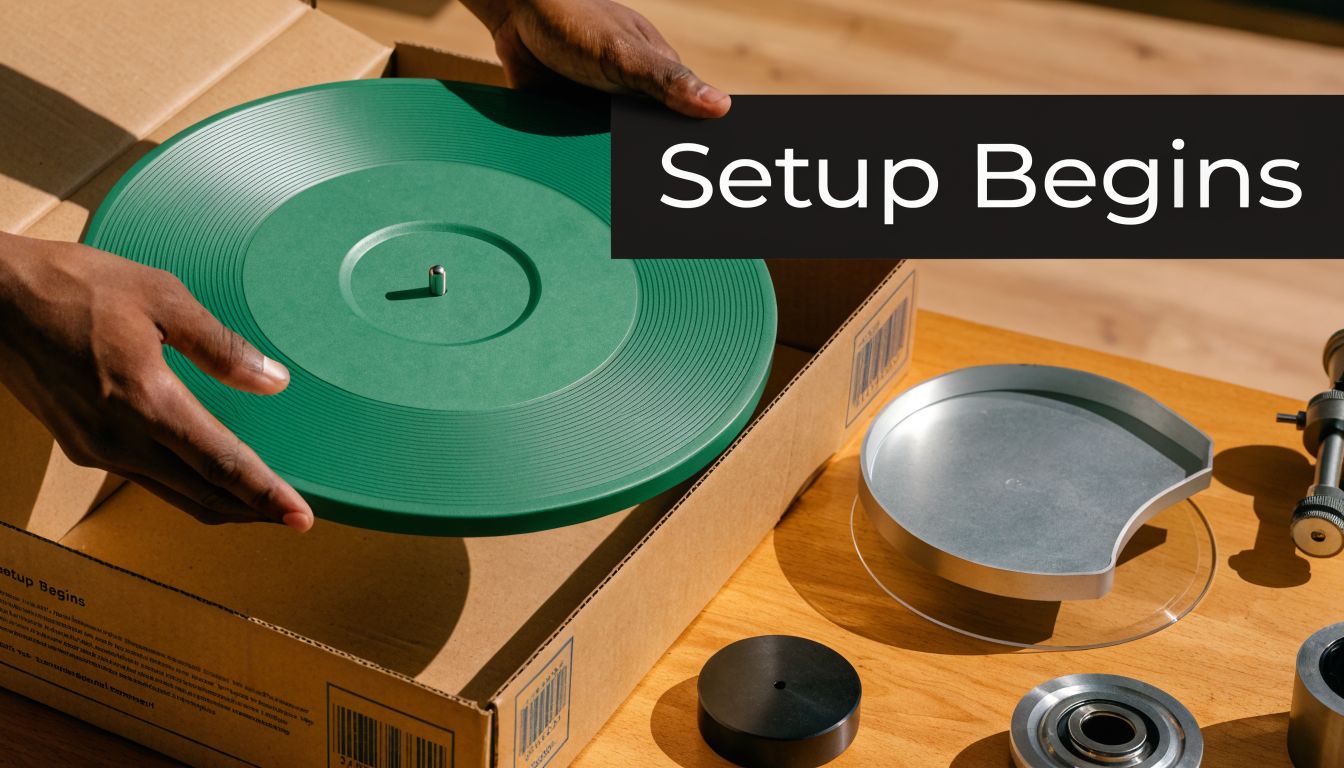
Lay everything out on a clean table before you fit anything together. Keep packaging nearby until the build is finished. If a part looks missing, it’s often tucked into a cardboard insert or a smaller accessory box.
Know the parts before you fit them
Most turntables arrive with the same core pieces, even if the styling differs. You’ll usually be dealing with:
- Plinth. The main body of the turntable. This is the chassis everything mounts to.
- Platter. The rotating surface that carries the record.
- Drive belt. On belt-drive models, this links the motor to the platter.
- Tonearm. The arm that carries the cartridge across the record.
- Counterweight. Fitted to the rear of the tonearm to set tracking force.
- Headshell or cartridge mount. The point where the cartridge attaches, depending on the design.
- Dust cover. Useful for storage, though many people play records with it raised or removed.
If you know what each part does, assembly becomes far less stressful. You’re not just following a diagram. You’re understanding the machine.
Build the deck in a sensible order
I always recommend this order because it reduces risk.
-
Place the plinth on its intended surface Don’t assemble the deck on a soft sofa, carpet, or wobbly side table and then move it. Set it on the furniture where it will live.
-
Fit the platter onto the spindle
Lower it straight down. Don’t angle it and don’t force it. -
Attach the belt if your deck uses one
Stretch it carefully around the motor pulley using the ribbon or access window provided by the manufacturer. If you twist the belt, you may hear speed instability later. -
Install the counterweight
Thread or push it onto the rear of the tonearm as designed. It should move smoothly, not grind or wobble. -
Attach the headshell or check the pre-fitted cartridge
Many beginner decks come with the cartridge already mounted. If yours uses a removable headshell, line it up carefully and lock it in place. -
Fit the dust cover hinges if included
Do this last. Hinges are awkward during the main build and easy to knock.
Don’t touch the stylus tip with your fingers. One careless brush can bend or contaminate it before the deck has played a single side.
The mistakes that cause trouble later
A lot of setup issues begin during assembly but don’t show themselves until playback. That’s why this stage matters more than it seems.
Here are the common ones I see:
- Platter not fully seated. The record won’t sit quite right, and speed can feel uneven.
- Belt twisted during fitting. The deck may run, but timing suffers.
- Counterweight fitted too loosely. Tracking adjustments become inconsistent.
- Tonearm clip left engaged during balancing attempts. People think they’re calibrating when the arm isn’t free to move.
- Stylus guard removed too early. Leave it on until you’re ready to calibrate.
What good assembly feels like
A properly assembled turntable already gives off clues before you hear anything. The platter spins freely. The tonearm moves without resistance. Nothing rattles. Nothing leans. No part feels improvised.
That’s the point where a box of components stops being intimidating and starts looking like a working deck. Once you’re there, the next stage is wiring it so the signal stays clean from groove to speaker.
Making the Right Connections for Pure Sound
A turntable can be perfectly assembled and still sound dreadful if the signal path is wrong. This often leads to problems in many first setups. The deck is built, the speakers are on, the record drops, and then you get either silence, thin sound, or a nasty hum underneath the music.
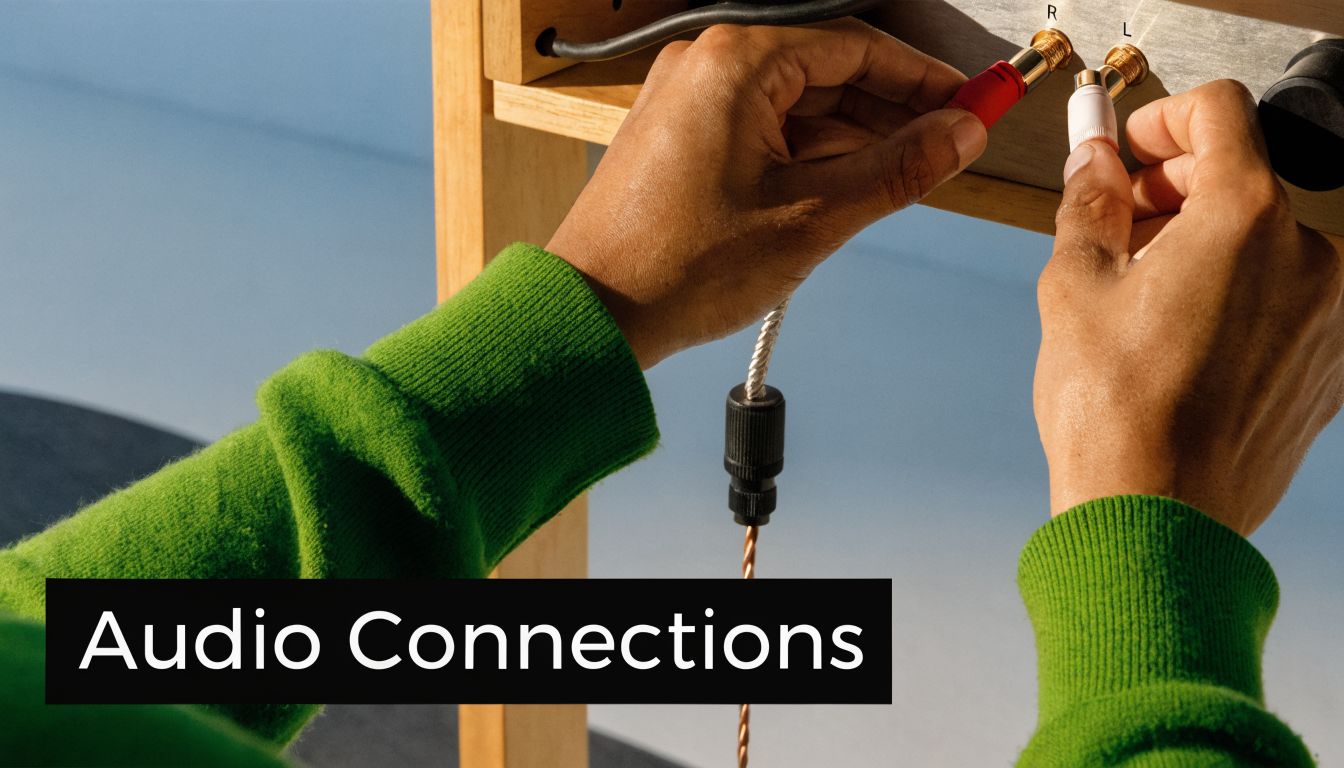
The fix is usually not dramatic. It’s about understanding what signal a turntable produces and where that signal needs help before it reaches the speakers.
Why phono isn’t the same as aux
Vinyl playback needs a phono preamp because the signal coming off the cartridge is tiny and specially equalised. A standard AUX input expects line-level audio. A turntable without the right preamp stage feeding AUX will sound quiet, flat, and wrong.
That requirement became standard because record players evolved alongside the LP era. The 1948 arrival of the 33⅓ rpm LP moved listeners away from short 78 rpm shellac discs and into longer-playing microgroove vinyl. In the UK hi-fi boom that followed, setups needed finer styli, stable speeds, and RIAA equalisation to handle a frequency response of 20Hz-20kHz through the phono stage used in modern systems. By 1955, 70% of UK households owned a record player, which helped establish the hum-free connection practices still used now, as described in this timeline of vinyl records history.
Choose the right signal chain
Most systems fall into one of these paths:
| Setup type | Connection path | Best for |
|---|---|---|
| Turntable with built-in preamp and active speakers | Turntable to speakers via RCA | Simple home listening |
| Turntable with built-in preamp and amplifier | Turntable to line input on amp | Traditional hi-fi systems |
| Turntable without built-in preamp | Turntable to phono preamp to amp or active speakers | Better control and upgrade flexibility |
| Turntable into amplifier with PHONO input | Turntable to PHONO input plus ground wire | Classic hi-fi route |
If your amplifier has a PHONO input, use that. If it doesn’t, you need either a turntable with its own preamp switched to LINE, or an external phono stage between the turntable and the amp.
Make the connections in the right order
The cleanest way to wire a record player setup is to think of the sound as a journey.
- Stylus to cartridge. The stylus reads the groove, the cartridge converts that movement into signal.
- Cartridge to phono stage. The preamp boosts and equalises the signal.
- Phono stage to amplifier or powered speakers. This brings the music into the rest of your system.
- Amplifier to speakers. The final stage that puts sound into the room.
A practical checklist helps:
- RCA first. Match red to right, white to left.
- Ground wire next. If your deck has one, attach it firmly to the ground post on the amplifier or phono stage.
- Check the switch. If your turntable has a PHONO/LINE switch, make sure it matches the system you’re plugging into.
- Power last. Once audio paths are secure, then switch on.
A hum that appears the moment the system powers up often points to grounding, not a faulty record or bad speakers.
The grounding habit that saves headaches
Grounding looks minor until it isn’t. A loose or missing ground connection is one of the fastest ways to ruin an otherwise solid setup. In home listening it’s irritating. In live use it can become all anyone hears between tracks.
If there’s hum, do these checks before blaming the deck:
- Tighten the ground spade or wire end
- Confirm the RCA plugs are fully seated
- Move signal cables away from mains leads
- Check the PHONO/LINE switch position
- Test another input on the amplifier if available
Good wiring doesn’t make vinyl glamorous. It makes it dependable. That’s what you want. Not mystery. Not noise. Just signal moving cleanly from the groove to the room.
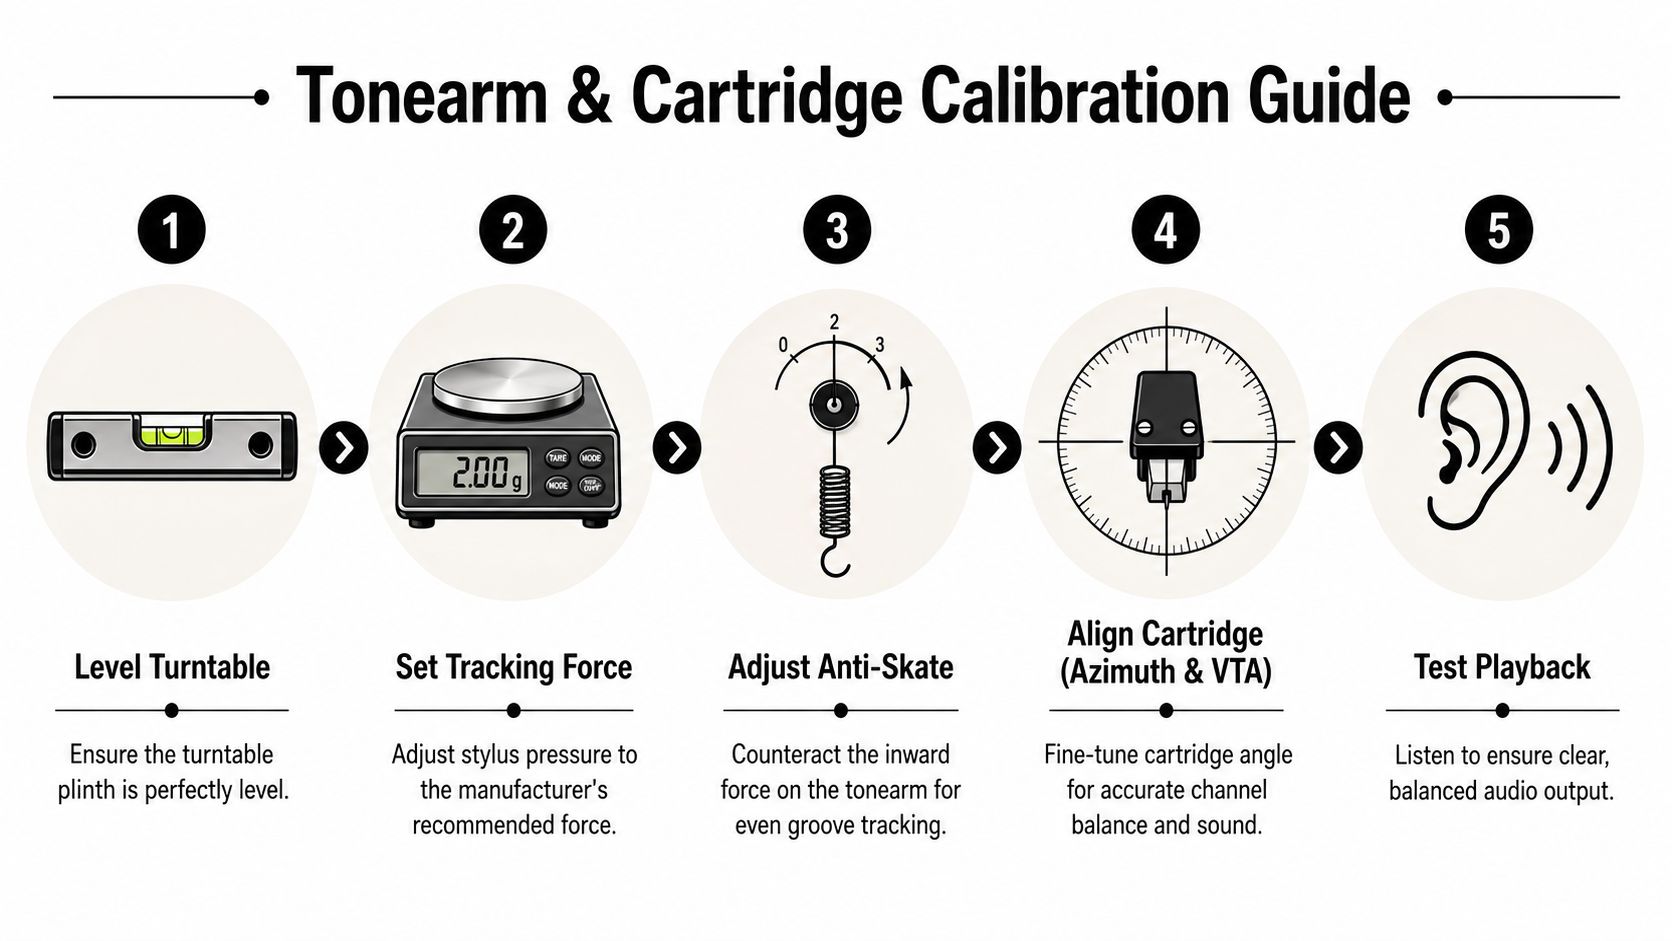
Calibrating Your Tonearm and Cartridge
Assembly gets the deck standing. Wiring gets it speaking. Calibration is what gets it singing properly.
This is the part casual guides often rush through, but it’s the part that decides whether your records sound open and stable or strained and uneven. The stylus is tracing a groove with tiny physical movements. That means small setup errors aren’t theoretical. They become audible fast, especially toward the inner grooves.
One figure says it all. 68% of novice setups fail sound quality tests due to turntable tilt, cartridge misalignment greater than 0.5° leads to inner groove distortion in 75% of cases, and incorrect VTF causes 40% of premature stylus wear within 500 hours, according to this record player setup guide for beginners.
Start with level before touching the arm
People love to jump straight to the cartridge. Don’t. If the deck itself isn’t level, every adjustment after that is compromised.
Use a small bubble level on the platter. Check front to back, then side to side. Adjust the feet if your turntable has them. If it doesn’t, use shims under the furniture, not random bits under the plinth corners that can shift later.
A level deck gives the stylus a fair shot at tracking evenly. Without that, you can chase symptoms all afternoon.
Balance the tonearm properly
Before you set tracking force, you have to zero the arm. Patience is essential during this step.
-
Fit the stylus guard if possible
It protects the tip while you work. -
Set anti-skate to zero
You don’t want lateral pull influencing the balance point. -
Release the tonearm from its rest
Hold it carefully so it doesn’t swing. -
Turn the counterweight
Move it until the arm floats roughly parallel to the platter. It shouldn’t rise sharply or drop towards the mat. -
Return the arm to the rest
Once balanced, set the tracking-force dial to zero if your counterweight uses a numbered ring.
That floating point is your reference. Get it wrong and every setting after it is guesswork.
Here’s a useful visual walkthrough to pair with the written steps:
Set vertical tracking force by the cartridge, not by hope
Vertical Tracking Force, usually shortened to VTF, is the downward pressure the stylus applies to the groove. Too light and the stylus can mistrack, spit on sibilants, and skip. Too heavy and you’re asking for unnecessary wear.
The guide above notes that incorrect VTF contributes to premature stylus wear. That’s reason enough to take it seriously.
Use the cartridge maker’s recommended range. Then set it accurately.
- Basic method. Rotate the counterweight to the target force after zeroing the arm.
- Better method. Verify with a digital stylus force gauge placed at record height on the platter.
- Best habit. Recheck after transport or any accidental knock.
If the cartridge recommends the middle of a range, I generally prefer to begin there rather than at the lightest possible setting. Chasing the lowest force can sound appealing on paper, but mistracking does more harm than sensible, stable contact.
If vocals sound spitty or the stylus seems nervous in the groove, don’t assume the record is bad. Check VTF before anything else.
Align the cartridge so the stylus tracks the groove cleanly
Cartridge alignment is where your record player setup starts feeling like precision work. The cartridge must sit in the headshell at the correct angle and position so the stylus traces the groove with minimal error across the record side.
A two-point protractor, whether Baerwald or Löfgren-B, makes this manageable. The exact geometry depends on your preference and arm design, but the discipline is the same.
What to do
- Loosen the mounting screws slightly so the cartridge can move
- Place the protractor on the platter
- Position the stylus on the first null point
- Square the cartridge body with the grid
- Check the second null point
- Repeat until both points agree
- Tighten carefully without twisting the cartridge
What to listen for when it’s wrong
| Symptom | Likely issue |
|---|---|
| Distortion near the end of a side | Alignment error |
| Left-right imbalance | Azimuth or seating issue |
| Thin, edgy treble | Misalignment or too little tracking force |
| Congested soundstage | Cartridge angle not optimised |
Small changes matter here. A cartridge that looks “close enough” often isn’t close enough.
Match anti-skate to the tracking force
As the record spins, the tonearm naturally wants to pull inward. Anti-skate counters that force so both groove walls are read more evenly.
The usual starting point is simple: match the anti-skate setting to your VTF. Then listen. If one channel sounds stressed before the other, or the arm behaves oddly during cueing, fine adjustment may help.
I treat anti-skate as a listening-led control, not a blind dial. Start with the recommended setting. Then use music, not myth, to refine it.
Use a method, not random tweaks
The strongest setups all follow the same discipline:
- Level the deck
- Balance the arm
- Set VTF
- Align the cartridge
- Adjust anti-skate
- Test with familiar records
That order works because each step supports the next. Reverse it and you’ll keep undoing your own work. A good calibration session doesn’t feel flashy. It feels calm, repeatable, and solid. That’s exactly what you want when the first side drops.
Optimising Your Listening Environment
A perfectly calibrated turntable can still sound average if the room is working against it. Consequently, many home setups stall. The deck is right, the cartridge is right, the connections are right, but the sound still feels muddy, unstable, or oddly flat. Most of the time, the room and the furniture are the missing pieces.
The two things that matter most are isolation and placement. Ignore either one and you’ll hear the consequences.
Isolation stops the deck from fighting the room
A stylus doesn’t know the difference between music in the groove and vibration coming up through the stand. If your turntable sits on a flimsy cabinet, near a doorway, or too close to energetic speakers, it can pick up movement that has nothing to do with the record itself.
That’s when you hear woolly bass, low-level rumble, or actual skipping.
A few practical fixes work far better than people expect:
- Use a rigid surface. Heavy furniture usually beats lightweight shelving.
- Keep the deck away from footfall. Suspended wooden floors can be tricky.
- Separate turntable and speakers. Don’t crowd the deck between speakers if the furniture resonates.
- Add an isolation platform or feet. Even simple isolation can calm a lively surface.
The room is part of your record player setup whether you planned for it or not.
In event work, this becomes even more obvious. Put a turntable beside a sub-heavy rig on a hollow stage and you’ll quickly learn what feedback and mechanical vibration feel like. A domestic room can produce the same problem on a smaller scale.
Speaker placement shapes the stereo image
A lot of people spend ages on cartridge alignment and then place the speakers wherever they fit. That wastes the effort. Speaker position controls how the soundstage opens up, how centred the vocal feels, and whether the bass arrives as punch or mud.
The easiest starting point is the classic equilateral triangle. Your listening position and the two speakers should form roughly equal distances. Then adjust by ear.
A simple placement guide
| Element | Better practice | What goes wrong if ignored |
|---|---|---|
| Distance between speakers | Give them space to breathe | Centre image collapses |
| Distance from rear wall | Leave some room behind them | Bass becomes boomy |
| Toe-in angle | Aim slightly towards the listening position | Treble can feel vague |
| Stand or cabinet stability | Use firm support | Timing and bass lose definition |
This doesn’t need to become obsessive. It just needs intention.
Rooms don’t have to be perfect to sound good
Not everyone builds a dedicated listening room, and most event planners aren’t working with acoustically ideal venues. That’s fine. You can still get a strong result by controlling the obvious problems first.
Soft furnishings help tame harshness. Solid furniture helps control vibration. Leaving breathing room around speakers usually helps more than buying another cable ever will. And if you want a visual reminder of the kind of atmosphere a setup should support, not just sonically but emotionally, that feeling is there in this DJ booth moment: focused, warm, and built for connection.
Good sound isn’t only produced by gear. It’s protected by placement. That’s why the environment deserves as much attention as the deck itself.
Pro Tips for Maintenance and Event-Ready Setups
Home hi-fi only has to please you. Event playback has to survive reality. That means transport, venue power, uneven tables, dusty records, wooden dance floors, people leaning on booths, and the possibility that the one problem you ignored in testing will show up right as the room fills.
That’s why an event-ready record player setup is built on habits, not luck. Maintenance keeps the deck honest. Troubleshooting keeps the night moving. Fine tuning keeps the music sounding deliberate rather than merely functional.
Maintenance that prevents bigger problems
Most turntable issues don’t arrive dramatically. They creep in. A little more noise. A little less focus. A touch of instability in the pitch. Good maintenance catches those signs before they become failures.
I keep the routine simple and repeatable:
- Clean the stylus carefully after sessions with a proper stylus brush or suitable cleaner
- Brush records before play so debris doesn’t become part of the signal path
- Check level regularly because furniture shifts and transport knocks settings out
- Inspect cables and plugs for strain, looseness, or oxidation
- Look at the belt on belt-drive decks for slack, glaze, or wear
- Secure the tonearm for transport every single time
For event use, I’d add one more rule. Never assume last weekend’s perfect performance means this weekend’s setup is still perfect. Check again.
Fast diagnosis when something goes wrong live
When a problem appears mid-event, don’t start changing everything at once. Work the chain logically. The symptom usually points to the fault if you stay calm.
If you hear hum
Start with grounding. A poor ground connection is a classic cause. Reseat the ground wire, check RCA connections, and keep signal cables clear of power leads where possible.
If the venue power is messy, simplify the chain rather than adding more adapters and hoping for the best.
If the stylus skips
Look first at the stand and the floor. In live rooms, mechanical vibration often causes skipping before any cartridge problem does. Improve isolation, move the deck if needed, and confirm tracking force hasn’t drifted.
A bouncing floor can defeat an otherwise solid setup. In those rooms, deck placement is a performance decision, not just a cosmetic one.
If the sound is muddy or lopsided
Check the cartridge seating, the headshell connection, and the condition of the record. Then revisit alignment-related settings. If one side feels less focused than the other, don’t just reach for EQ. Mechanical accuracy comes first.
On a live job, solve the physical problem before you solve the tonal problem. EQ can’t fix mistracking.
The advanced detail most guides skip
One of the most overlooked parts of record player setup is Vertical Tracking Angle and Stylus Rake Angle. Most hobby guides stop at “make the tonearm level”. That’s only a starting point.
Record thickness varies. UK vinyl collections often mix standard records with heavier pressings, and that changes the angle at which the stylus sits in the groove. According to this guide on cartridge alignment basics, a 2025 UK Audio Society report noted that 68% of enthusiasts experience channel imbalance from unadjusted VTA. The same source also points out that thicker records, such as 180g pressings compared with standard records, can justify VTA attention.
For DJs and serious listeners, this isn’t academic. If the arm height is off, bass can get cloudy, transients can soften, and the stereo picture can lose focus.
How to approach VTA without making yourself mad
You don’t need to turn VTA into a laboratory exercise. You do need to stop treating arm height as fixed forever.
Try this approach:
- Begin with the tonearm roughly parallel to the record
- Use a familiar record with clear vocals and stable bass
- Make tiny arm-height changes if your deck allows it
- Listen for centre image, bass definition, and treble balance
- Note what works for standard records versus heavier pressings
Some listeners prefer the rear of the arm slightly lower for a fuller presentation. Others prefer a touch higher for extra bite and openness. The point is to verify by ear, not assume by sight.
Event prep is about repeatability
A home setup can drift a little and still be enjoyable. Event work demands repeatability. You need to know that when the first soul record lands, the pitch is stable, the image is centred, and the deck won’t complain when the room gets lively.
That discipline applies beyond the technical side too. Organisation counts. Cases matter. Spare headshell leads matter. A backup stylus matters. So does a sensible visual check of the whole station before guests arrive. That same polished, intentional standard is the difference between improvised and professional, and it’s captured nicely in this event atmosphere visual.
DJ Pre-Event Turntable Checklist
| Check | Parameter | Why It Matters |
|---|---|---|
| Deck level | Platter sits level front-to-back and side-to-side | Prevents tracking imbalance and avoidable distortion |
| Cartridge security | Mounting screws and headshell connection are firm | Stops movement, mistracking, and channel issues |
| Tracking force | Set to cartridge recommendation | Protects stylus and supports stable playback |
| Anti-skate | Matched and listening-tested | Helps even groove tracking across both channels |
| Stylus condition | Clean, straight, free from visible debris | Preserves detail and reduces groove damage |
| RCA and ground connections | Fully seated and secure | Minimises hum and signal dropouts |
| Phono or line setting | Correct for the system in use | Avoids weak, distorted, or overloaded sound |
| Record condition | Clean and flat enough for use | Reduces noise, skips, and ugly surprises |
| Stand stability | No wobble, bounce, or resonant surface | Keeps playback reliable in busy rooms |
| Cueing test | Arm lowers smoothly and lands accurately | Prevents stylus damage and rough starts |
| Test record | Familiar track checked at venue volume | Confirms real-world performance before guests hear it |
| Backup plan | Spare stylus, leads, and cleaning tools packed | Keeps minor faults from becoming show-stoppers |
The best setups don’t feel complicated once they’re embedded as routine. They feel dependable. That’s the whole goal. A record player setup should let the music take over, whether it’s one person in a chair or a full room waiting for the next record to land.
If you want that level of care brought to your event, VinylGold delivers the kind of vinyl-minded professionalism that makes a room feel effortless. From weddings in London and Kent to private parties and brand events, VinylGold pairs sharp setup standards with deep musical taste, so the sound is clean, the flow is right, and the dance floor stays where it should be.